

Iced Stamped Gingerbread Cookies
Packed with cozy spices in a chewy cookie and coated in a sweet and simple glaze.

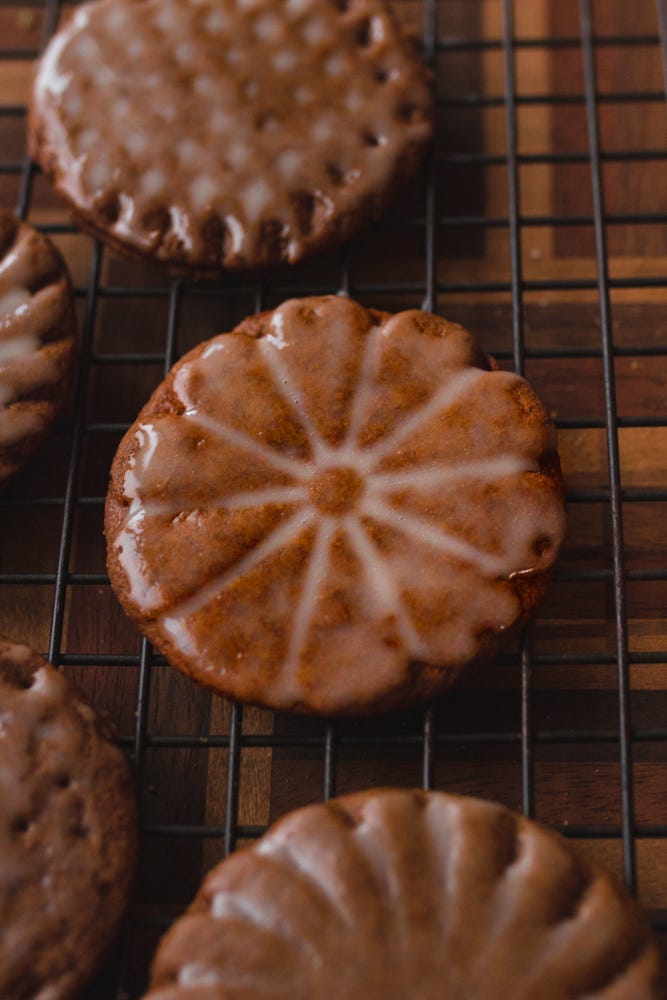
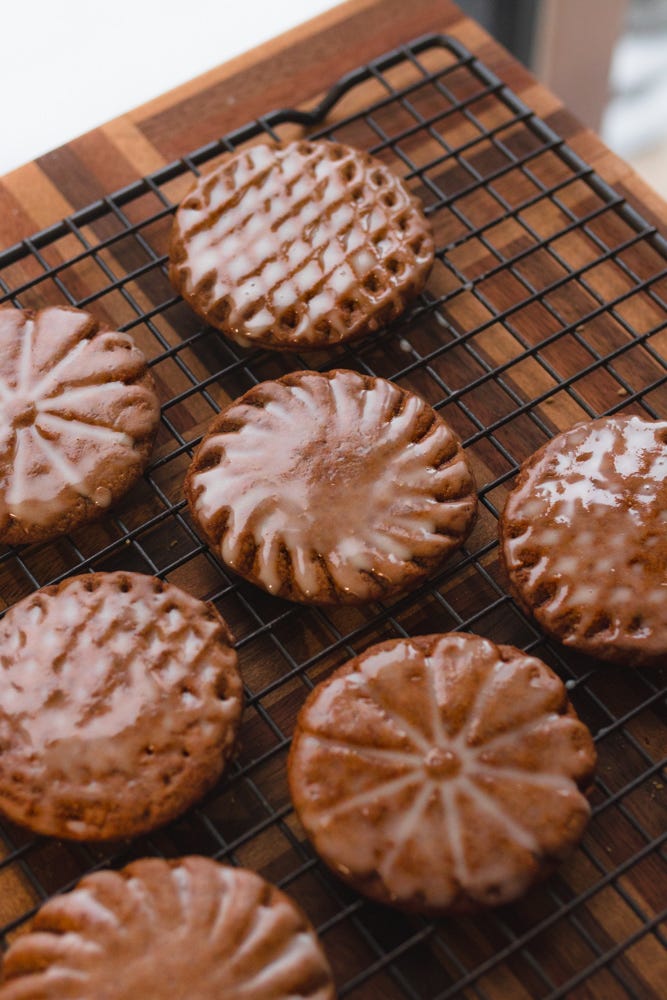
Welcome back to another recipe in our holiday cookie tin series. We’re at the halfway point now and we’d be remiss not to include a gingerbread recipe. These chewy cookies are packed with cozy seasonal spices and coated in a thin but sweet glaze. Made extra special with the use of cookie stamps to create a simple yet stunning cookie.
They’re easy to make yet are so impressive to your family and friends - truly a win-win for everyone. You can make this recipe without the use of cookie stamps but they do give it a really fun look so if you can find one we recommend it!
Why you’ll love this recipe:
Packed with cozy spices.
As pretty as it is delicious.
Easy to scale up and make a big batch.
Top tips for making iced gingerbread cookies:
Gently knead the dough to come together. This is not a dough you can just mix together. Once it’s almost together in the bowl, dump onto a clean smooth surface and gently knead until the dough just comes together.
Let the dough chill. This dough needs to chill before you can work with it so leave it in the fridge for at least 30 minutes before rolling.
Use flour to keep from sticking. This dough can be sticky when rolling out so dust the dough with a little (not too much) extra flour to keep it clean.
Don’t roll too thin. To keep the cookies soft the cookies should be on the thicker side. We aim for about 1/3 to 1/2 inch in thickness.
Give the cookie stamps a good press, but not too hard. You don’t want the cookie press to go all the way through the cookie. Press just hard enough to make a detailed impression on the top of the cookie.
Ice the cookies once cooled. Let to cookies cool completely before glazing them with the icing to get the right consistency.
How to make iced gingerbread cookies:
Prep Time: 20 Min | Chill Time: 30 Min | Bake Time: tbd | Total Time: tbd
Makes: 15 cookies
Ingredients
Dry Ingredients
480 g (4 cup) all-purpose flour
21 g (4 tbsp) ginger powder
7 g (4 tsp) ground cinnamon
2 g (1 tsp) ground cloves
2 g (1 tsp) baking soda
pinch salt
Wet Ingredients
267 g (1 1/3 cup) brown sugar
80 mL (1/3 cup) coconut oil, melted
120 mL (1/2 cup) non-dairy milk
120 mL (1/2 cup) molasses
1 tsp vanilla extract
Icing
60 g (1/2 cup) icing sugar
15 mL (1 tbsp) non-dairy milk
Instructions
In a large bowl combine dry ingredients and mix until combined. Set aside.
To the dry ingredients add the wet ingredients and mix with a silicone spatula until you can’t incorporate it anymore. It won’t be able to get fully insporated with just the spatula so turn out the dough on a clean surface and knead 2-3 times until a smooth dough ball forms.
Wrap dough in clear wrap and set in the fridge for 30 minutes.
Heat the oven to 350F. Prepare a baking sheet with parchment paper or a silicone baking mat.
Roll out dough on a floured surface or in between two sheets of parchment until about 1/3 to 1/2 inch thick. Make them thicker or thinner depending on a how soft you want your cookie. Thinner than this and they’ll be fairly crunchy.
Using a cookie stamp, gently but firmly press about half the depth of the rolled out dough and carefully remove to reveal the pattern. If you’re having trouble with the dough sticking, add a little extra flour to the press.
Using a round cookie cutter the same size or slightly bigger than the cookie stamp, and cut out the cookie around the stamped designs.
Carefully place the cookies on the prepared baking sheet and bake for 8 minutes if you want soft cookies or longer if you want them crunchy.
Remove from the oven and allow to cool for 5 minutes before transferring to a cooling rack to cool completely.
Whisk together icing sugar and non-dairy milk to make a simple glaze and set aside until the cookies have completely cooled.
Using a pastry brush gently brush the icing onto the cookie from edge to edge. Place the cookie down and let the icing settle and solidify.
Enjoy!
Recipe Notes:
We found our cookie stamps on amazon. But any metal cookie stamp should work okay. Find ones with designs you love!